Sunday, May 23, 2010

Meet Sigourney....

We are still getting rain almost every day... now mixed with sunshine....

Can you say "HUMIDITY" and MOSQUITOES" every one??

Actually, I have declared war on the mosquitoes (a bag full of mosquito coils and bug spray for those stupid enough to ignore the coils), and have them beaten into a bit of submission, which allows me to go out and work on my dollhouse in little bursts without becoming eaten too badly. Right now I have cabinets and moldings clamped and drying.... not much to see and because of the humidity, they are taking forever to dry.

HOWEVER, as I have said in my last post, I have been taking advantage of my inside time, and have been working on area rugs and mats, and learning some new techniques for other stuff. I always loved to figure out how to do something new. It keeps my miniature making always something new and fun.

Okay, all that being said, meet Sigourney:

She is named that because of her red feathers. I have been missing my pet parrot, who is still in the States for a little while longer, and decided my dollhouse was going to need a pet bird. I always wanted a Macaw, so now I have one. (My real parrot is a blue fronted amazon and I didn't have the right colored feathers to do him.)

Sigourney is made with a styrofoam core, then painted, feathered and flocked. Her eyes are glass beads and reflected funny in this picture, and her feet are made of wire.

Here is a close up of her:

So, I had to build her a stand, and as I am always saying, the difference between a good dollhouse and a GREAT dollhouse is all in the details. Sigourney not only has a stand with a toy, food and water and a ladder, but she also has newspaper in the bottom with a couple of feathers and a few "droppings" as you can see in this picture:


*giggles*
Yeah..... it's all about details.

As I have been saying all along, everything in the dollhouse will be for sale. Sigourney is no exception. You can find her listed on my Etsy shop. If she doesn't sell, she will go in my dollhouse. If she does..... well..... I'm working on a pair of parakeets right now!

Until next time!

Wednesday, May 19, 2010

More progress in spite of flood and pestilance...

It has been raining pretty good for the last three days here. Now for those of you following, or that know me, there are a some facts you know:
1) I live in the tropics.
2) The weather stays warm enough year round that it's okay to be outside.
3) My "workshop" is outside on a covered patio.

Here are some facts that I have just learned, and you need to:
1) My roof covering my patio leaks in several spots.
2) The tile that was used on my patio is as slippery as ice when it's wet.
3) The mosquitoes in the tropics are VICIOUS BAST@#&%*, VERY aggressive, and come out by the millions when it rains here.

Okay, now that you have that knowledge, you will understand that most everything I have done for the last couple of days, I have done INSIDE my house, and I have only been out at the dollhouse to do things that absolutely HAD to be done there, or to take pictures.... and even then, I was getting bitten so badly that I ran back inside and forgot to get one of the pictures I was going to take. Y'all will just have to live without the picture of the little round entry rug I made. I'll show it to you next time. The sun is setting right now and the mosquitoes are getting worse, and I am a coward!

Okay, all that being said, I do have some stuff to show you. These are all things I have been doing inside, but then ran out to put it all in place and take pictures.

We'll start with the main bathroom:

As you can see, I got the sea horse painted, hook put on, and door installed. I also got a medicine cabinet put up, the counter put in with sink, and just for fun, I have added a seashell "soap dish" and a nice fuzzy rug. It's not a finished bathroom, but it's an awesome start!

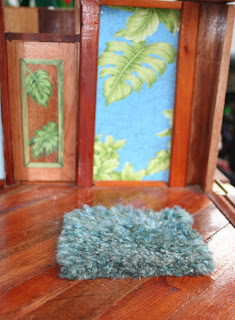
I also made a rug for the third bedroom...

We have kind of decided that this room will become a "teen" room, thus a great shag rug.

In the second bedroom, I painted the upper portion of the door, and although it's a lot better, I still think It needs mirror doors on the closet.

Don't y'all agree?

Well, I'm going to keep on hiding inside until the sun comes out.... maybe tomorrow? We'll see.
Until then...

Sunday, May 16, 2010

Slow as the tortoise...

Yup, I'm feeling like the tortoise in "The tortoise and the hare" story. I spend the whole day working my butt off, yet when it comes time for pictures for this blog, there is little to show. It's not that I'm working slow really, it's just that I have gotten to a part that has lots of detail to work properly, and it is REALLY time consuming!! Between drying times and little things that really don't show, it doesn't make for fun and exciting pictures.
*sigh*

Still, I move steadily forward.

Todays offerings are the doors in room two.


Well, I got the closet doors finished and installed. They slide well now, and look pretty good, I think. I also finished the door to the bedroom, but have not installed it yet. It's just propped in place for the picture and so I could get a good look at it. I look at the room, and am not really pleased. I can't quite put my finger on it, but it doesn't have that clean modern feel I am going for. I'm thinking that I WILL replace the closet doors with mirror, and I may paint the top panel of the door (where the wallpaper is) with the color that is on the adjoining painted wall. I think that may help.

Here's another view..

See, that doesn't look as bad. I think there is just way too much wallpaper in that first picture. That'll teach me to try and cut costs. I guess I'll just have to buy the pieces as I can afford them, and if it takes longer, well then, it just takes longer.

As I said, there really isn't as much to show you as I'd like, but I did get the main bathroom door designed the way I want. I have decided to go with a "ocean" theme in there, and I added this awesome sea-horse to the back (inside) of the door. I will add a hook in his eye to provide my tiny dollhouse with a place to hang a towel or robe. That should look cool.

I am planning on coming back in with some paint and adding some detail to this little guy so that he really pops. It should look cool when done, then I can get it installed.

Well, I know it doesn't look like much, but I am pleased with where it's headed. We'll see what I can get done today.
Until next time...

Saturday, May 15, 2010

I'm back and at it again...

Wow. Hard to believe it's been a week! Sorry to be away so long! It's been a rough week.

Last Saturday night I started not feeling great, then woke up on Mother's Day with the worst tummy cramps I've ever had. I can't remember anything like that since I had my daughter, but they were in my tummy.. not lower. Anyway, stayed icky through Monday. Tuesday I felt a whole lot better, but was weak as a kitten for a few days and just couldn't deal with the heat of working outside. As most of you who have read my whole blog or know me personally, already know, I live in the tropics, and we are in the middle of our summer. It gets hot and humid. I actually don't mind it, and my studio is outside, but when you aren't 100%, it can be a little oppressive.

In the mean time I have been working on stuff to go inside the dollhouse... plants, kitchenware and other such things. I've listed a couple on Etsy, but sales have really taken a dump. I have no clue what is going on, and it is extremely depressing. Without the sales, it won't be long before I can't go any further on this dollhouse. That breaks my heart. Most of the stuff I have been using is recycled, but things like the glass and mirror have to be cut special for me, and while the guy gives me a huge break, it still isn't free.

Well, yesterday I decided it was time to get back to it. I spent the early part of the day just cleaning dust and junk out of it. We've had a couple of storms this last week, and even though it is safely under a roof, the wind still blows stuff everywhere.

When I last worked on this house, I was working on making doors, so that's where I picked it up. I cut and glued up some frames for the doors that hadn't yet been made, and started installing the ones that had.


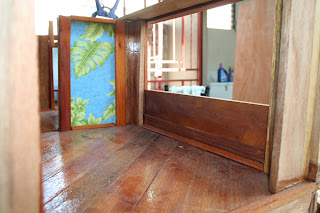
As seen in the above two pictures, The doors to the third bedroom and the master bedroom have been put in. I need to add more wall above them today. They still have no handles, but I'll sit down and make some in the next day or so.

I also started putting in the track for the by-pass doors for the second bedroom.

Originally I was thinking I'd like to have mirror doors, but when sales dropped off, I have decided that in the interest of money, I'd just match the wallpaper over plywood. Maybe if I start making some sales again soon, I can mirror the master bath and third bedrooms closet, or if it's soon enough, I can replace these doors. We'll see. I hate cutting corners, but we have to do what we have to do, even if it isn't what we wanted.
*sighs*

Anyway, I'm off to hit it hard today. I'll see how far I can get. Until next time....

Saturday, May 8, 2010

Starting on doors....

Yesterday morning was a busy morning, so I only got to work on the dollhouse yesterday afternoon and evening. Since I am trying to get the last of the details for this second floor done, I decided I probably should start getting the interior doors in. I can't do the wall above them until they are in place. So, I started looking at the different rooms and realized that if I just used plain old doors, it sure wouldn't be in keeping with the design and detail I am trying to put into this house. That being said, I decided that each room needed a door that was in keeping with the style and theme of the room. So far I only have done two doors and they are not yet installed (only propped in place so y'all can see them), and they don't have door handles yet, but I thought you might like to see where I am going with them.

The first is the door to the master bedroom.
This is the view of it from the hall way.
and this is what it looks like from inside the room.
and here is a view of the room with the door so you can see what I was going for. I thought that the basket weave design would be in keeping with the wallpaper I chose for the room. I used a green wash to stain the woven part on the inside, then varnished the entire door. I will do something very similar for the door leading into the bathroom.

Now, for the second room. I was inspired by the wallpaper in the 3rd bedroom first, so that one got the next door.
I took the idea from the large leaf in the wallpaper design, and hand painted it on to the inset panel of the door. Then I did a paint wash over the trim and put varnish over the entire door.
I left the outside (facing the hall way) plain.

Now I am hoping that while I make the door for the master bathroom, I will be inspired with a great idea for the main bathroom and the 2nd bedroom. Well, see how today goes.

Until next time....

Friday, May 7, 2010

The wall...


I'm starting today's entry with the wall. Of course it will look better once it's finished, but here is the outside of what will be seen from the inside.... does that make sense?


This picture shows what it will look like when open. Not a real pretty sight, but most people will never see this when it's on display.

These next three pictures are the wall from the inside.


You can see how nice and snugly the wall fits with the inside of the rooms. This was super important to me. I don't want people to be able to look at it and say, "Oh, this is how you get inside." I want them to have to look long and hard.

As you may have noticed, there is a new stair case added in the hall way. Yup, I decided that a square spiral would go well there to reach my elusive third floor. Here's a better view of it...

Yes, I noticed one of my rail supports is crooked. *sighs I will fix that before I add the top hand railing. It must have slipped before the glue got dry. That happens.

Well, as you can see, progress is being made. It won't be much longer before I am off to get more glass, and get ready to add the third and last floor. I still have bathroom fixtures to put in, so I will work on them this weekend. Hopefully sometime next week I will be wrapping up this second level.

Until next time....

Thursday, May 6, 2010

FINALLY I can work on the dollhouse again!!!!

This varnish took FOREVER to get to the point where it wasn't tacky anymore!!! I guess varnishing it in the hottest and most humid time of the year really wasn't the smartest thing I could have done.... But it's done and dry and now I can move forward!

So, yesterday I set about attaching the movable outside wall. Hinges that can be hidden by trim seemed my best route. They took a while for me to get them exactly right so that the door/wall sits nice and flush against the house so walls can be added to it seamlessly, but it worked out well, I think.


This wall can now be opened and closed to allow access to the entire inside of this side of the dollhouse.

Looks good doesn't it? I am pleased.

Today I should be able to start adding walls to it so that they fit all nice and snugly into the house. I also need to start figuring out exactly how I will be able to "lock" the wall into the closed position. I don't want just anyone being able to open and close it while I am displaying it in shows. I'm thinking I'll do pins.... something like I did for the removable glass walls on the first floor, but I'll have to see how well they can be hidden.

Now, I want y'all to know that I wasn't just sitting doing nothing during my "down" time. I worked long and hard creating plants for this house that will also be for sale. I don't want to post the pictures till they are in place. They have turned out great though, and again, I am pleased.

So, until tomorrow....

Sunday, May 2, 2010

What a difference a day and varnish makes....

Yup, I FINALLY got the varnish on the inside of the dollhouse. I wasn't able to do anything else cause that stuff takes forever to dry, but it's varnished.


The master bedroom looks so much better with the natural wood color brought out.


Even the master balcony has a more finished look and feel to it.


Even the second and third bedrooms are starting to look like some place I'd like to be.

and what can I say about the hall way? Wow. What an amazing transformation. Now I can make some informed decisions on whether or not I want to leave all the walls like that, or paper a couple of them. Hmmm.......

This house is finally starting to look like something. Now to start working on the details. Until next time...

Saturday, May 1, 2010

Trimming out the second floor......

This has to be one of the slowest and most boring parts of building a dollhouse in my opinion. When it's done, it does make a HUGE improvement, but it doesn't give the instant gratification that so much of the rest of it does. Still, trim is a must for a finished look. Without it, your dollhouse just looks unfinished an sloppy.

So, yesterday was trim day. Here are the results....


The master bedroom Is now ready for varnish and it's doors and then glass (after a good cleaning, of course).


The second bedroom is ready for the next step as well, but this room made me giggle yesterday. As I was trimming it out, I got to the closet and in the upper right hand corner I noticed a small bug. Now when I say small, I mean SUPER TINY! I had to get a magnifying glass to see what it was. Well, there in the corner was a spider web that was maybe an inch round and invisible to the naked eye, and right in the corner was a itty bitty spider. Now don't get me wrong. I am one for details, but that took it to a level that I wasn't quite ready for! I hate spiders and they scare the crap out of me (I was bitten by a brown recluse once) but this one was so tiny that even I wasn't threatened, so she was relocated to my garden. I did find it funny though that she was in perfect scale to my dollhouse, and I have to wonder if she realized where she was.


Bedroom #3 is coming out amazing. I have to say that I am really liking the blue and the whole tropical feel of this room. This one is going to be extra fun for me to decorate! I will keep with the feeling and probably use lots of plants and stuff for decoration.

Now the bathrooms are not ready yet. When I do the trim in them, I also have to put in the fixtures at the same time so they can look "built in", and well, I don't have them made yet. So the bathrooms will have to wait for a bit, and I will varnish the pieces before I put them in.

Today I will start varnishing. Once everything is cleaned out, and all the dust is removed, I will set out to get the first layers on the entire second floor. I'm excited. It's the varnish that really makes everything "pop". So, with that in mind I am off to work.

Until next tomorrow....